Painted these two this weekend. Minions from the “Mechs vs. Minions” game. Took about 5 hours for the pair.
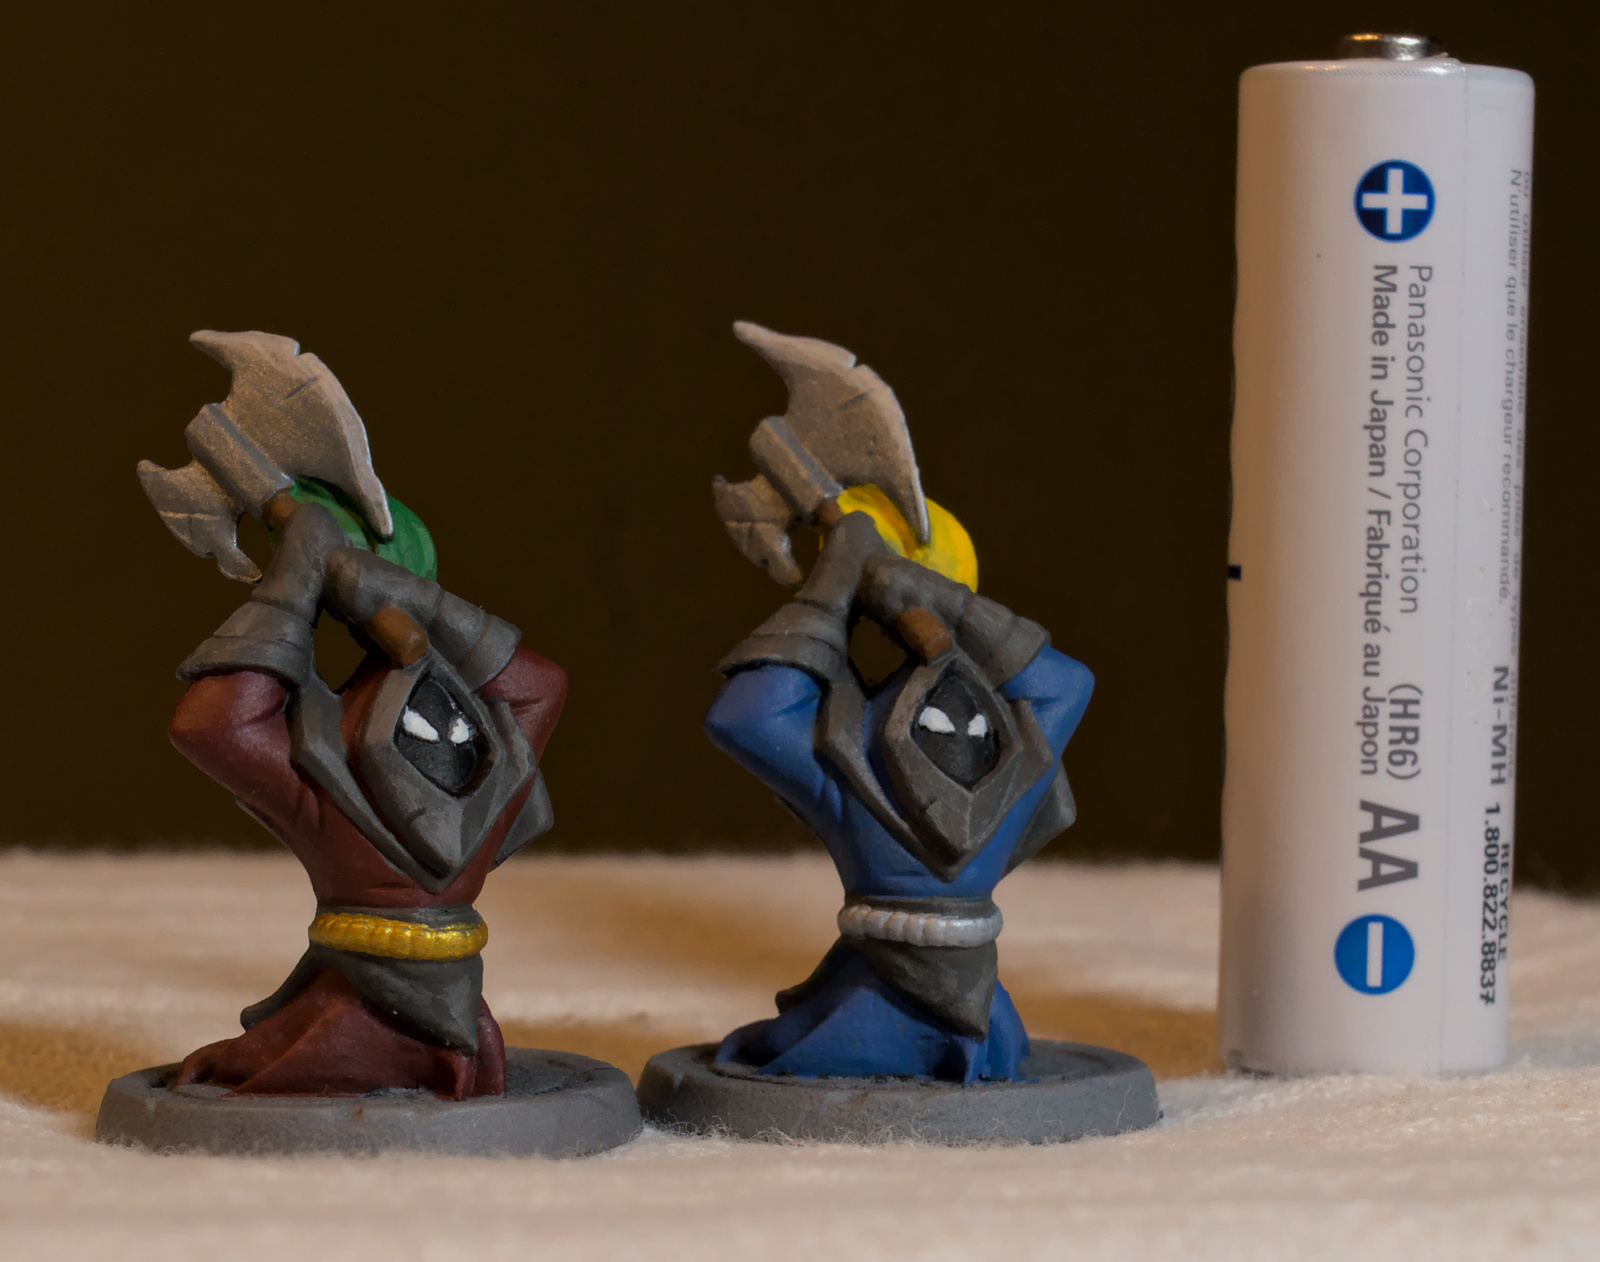
Painted these two this weekend. Minions from the “Mechs vs. Minions” game. Took about 5 hours for the pair.
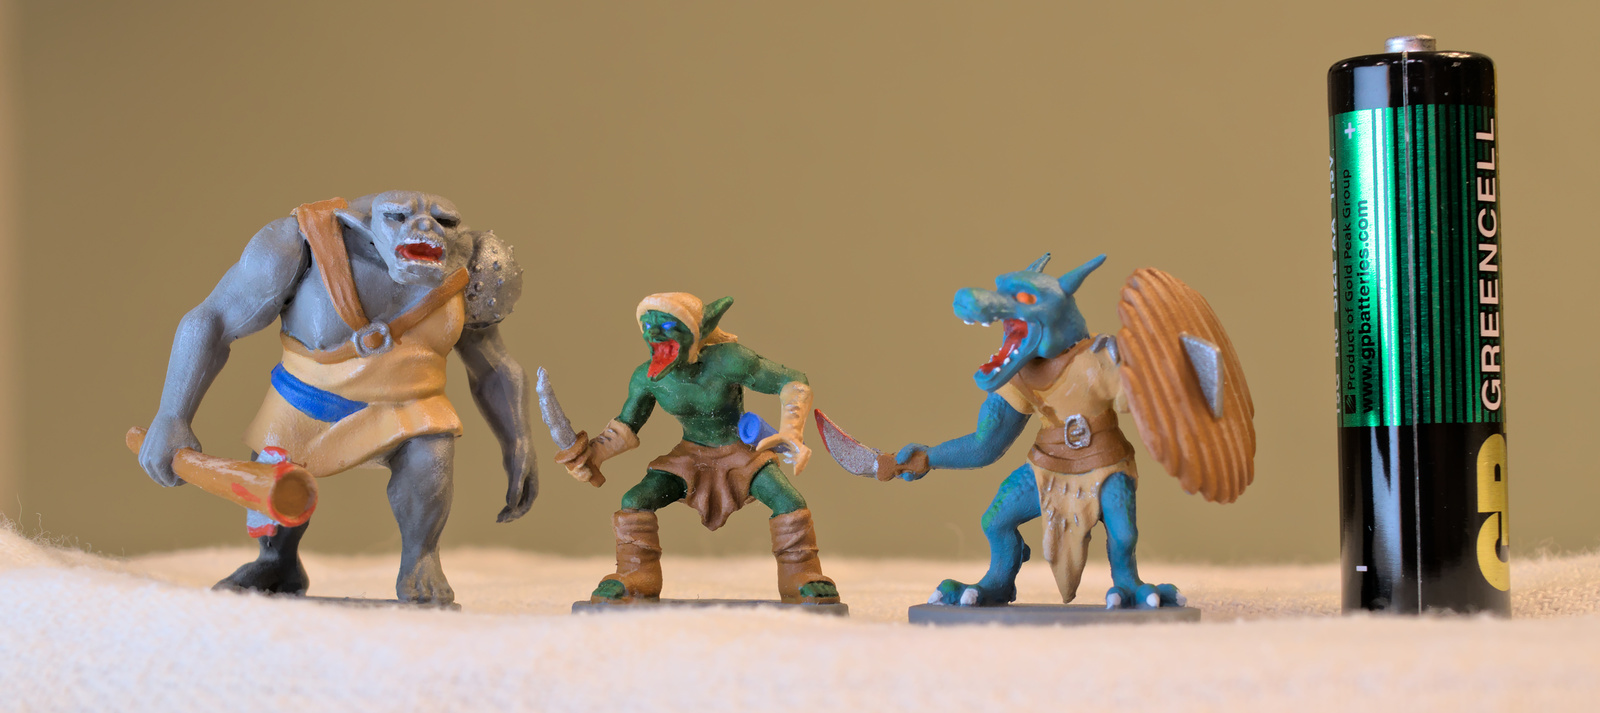
I finally finished painting another crop of miniatures. I think I started these back in ~August, but then didn’t find an alignment of time and motivation to finish them until last weekend. AA battery for scale, the troll’s leg is dark because it’s in a shadow.
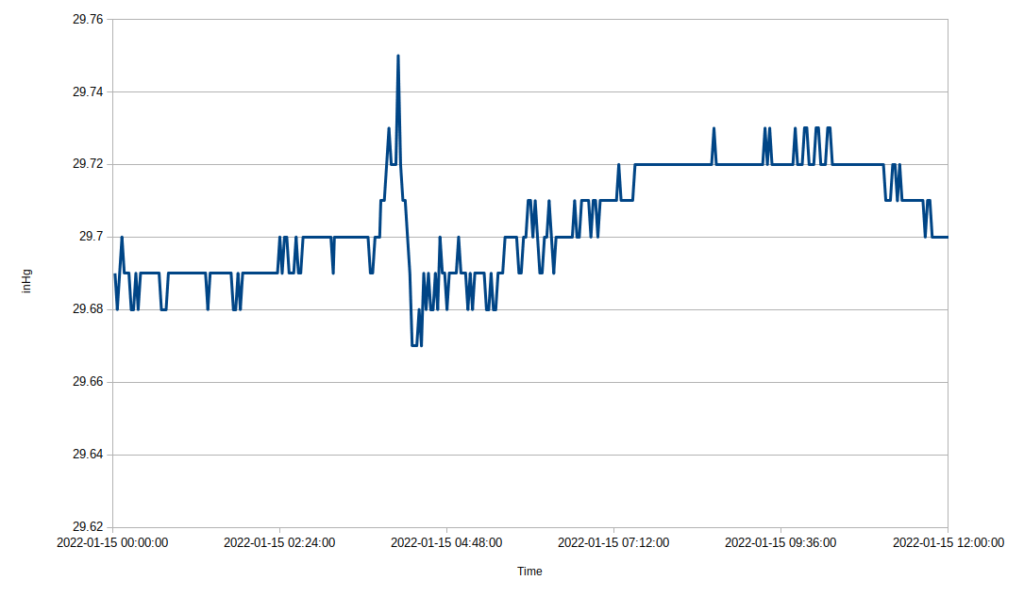
It appears that I caught the atmospheric pressure wave from the eruption of the Honga Tonga volcano on my weather station’s barometer:
This year I cobbled together a water-level sensor for the Christmas-tree stand. For several years I’ve looked for such a sensor, but never found anything that could do the job. I’ve found water sensors, but they’re designed to “trigger” when wet and often times emit an alarm. Other water sensors might have given me an acceptable wet/dry signal, but were built as a single unit which can’t be submerged in the stand.
So I used a standard Zigbee door sensor to accomplish the task. I used this one by Third Reality. It uses 2 AAA batteries, which I preferred over a button battery model since I’ll only use it for about a month each year and I can use rechargeable batteries.
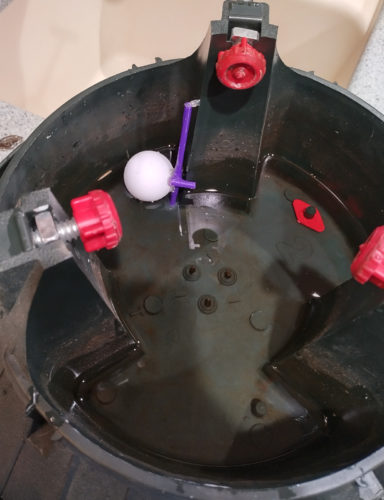
The premise is to use a float which will fall into range of the sensor when the water level drops and rise up out of range when water is added. So when the sensor signals that it is “closed” that means the tree needs water.
This sensor is connected to my Home Assistant smart-home manager which I have running on a Raspberry Pi 3. It uses the Zigbee Home Automation integration which I’m using with a ConBee II dongle. I’ve been really happy with this set up so far, I’ve had zero issues pairing devices or keeping their connections active.
The sensor, as shown, is made up of two pieces. The actual electronics are in the left part and the piece on the right is just plastic housing around a magnet. I removed the magnet and hot-glued it to a Ping-Pong ball which acts as a float. I also cut a piece of a plastic straw and glued that to the Ping-Pong ball which will be the guide for the float. Using the rest of the straw I slit it length-wise which caused it to curl into itself just a little allowing the float-guide to slip over it and slide smoothly up and down.
I attached one more piece of straw to the float to prevent it from spinning (which would pull the magnet away from the sensor). Then I hot-glued the long piece of straw into the tree stand along one of the support posts, which are hollow.
I paired the sensor to my Home Assistant set up and then used some Velcro stickers to stick the sensor to the inside of the support post and then adjusted the height through trial and error to get the “dry” alert when I wanted it. I didn’t want it to be actually dry because I wanted there to be a grace period from when it says, “I need water” before it actually goes dry.
I don’t have a picture of this part because I got it set up and didn’t take a picture and now the tree’s in the stand and there’s no way to see the bottom. Which also means there’s no way to change the batteries while the tree is up. The manufacturer claims “up to 2 years” battery life, so getting a month shouldn’t be a problem. The sensor also reports battery level, and it hasn’t dropped a single percentage since I installed it.
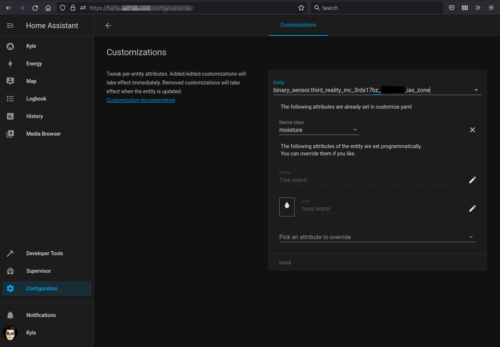
Next I reconfigured the “device” in Home Assistant and told it to treat it as a “moisture sensor” instead of an “open/closed sensor.” So now instead of saying “open/closed” in the user interface it says “wet/dry.” I used the “Configuration -> Customizations” GUI to set this up:
The generated YAML (in customize.yaml):
binary_sensor.third_reality_inc_3rds17bz_XXXXXXXX_ias_zone:
  device_class: moisture
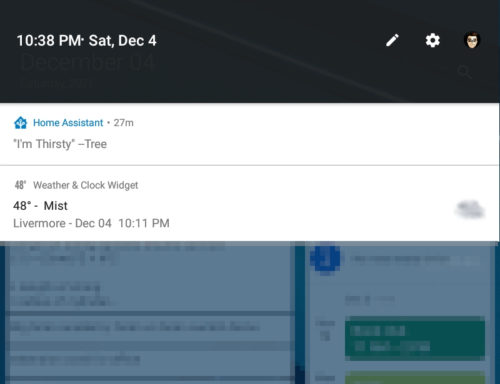
And, finally, I added an “automation” which triggers when the sensor detects the magnet (indicating “dry”) and uses the “call service” action to send an alert to my tablet and/or phone which says “I’m Thirsty.” I used the “Configuration -> Automations” GUI to set this up:

The generated YAML:
alias: Notify when tree needs water
description: ''
trigger:
  - type: not_moist
    platform: device
    device_id: 5bca35081c2232eaXXXXXXXXXXXXXXXX
    entity_id: binary_sensor.third_reality_inc_3rds17bz_XXXXXXXX_ias_zone
    domain: binary_sensor
    for:
      hours: 0
      minutes: 1
      seconds: 0
      milliseconds: 0
condition: []
action:
  - service: notify.mobile_app_kyle_s_tablet
    data:
      message: '"I''m Thirsty" --Tree'
mode: single
All of this is running entirely local to my own home. No Internet required, no external servers in the mix and I don’t have to wonder whether some company will decide to shut down their systems and break all my stuff.
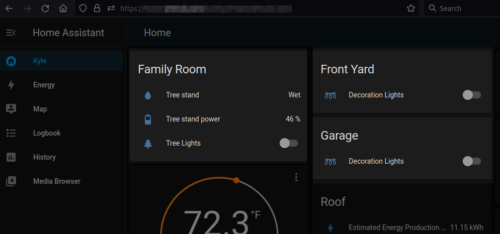
I am greatly amused by this set up, especially because it actually just worked with almost no fussing around. And now I’ll be going about my day and get a notification on my tablet from my tree asking for water. I live in the future.
Over Thanksgiving a big storm blew through. We were out of town but I noted that my weather station reported a bunch of rain and then stopped transmitting. When we got home, I climbed up on the roof to investigate. I replaced the batteries (which hadn’t been changed in 2.5 years) and the station started reporting again.
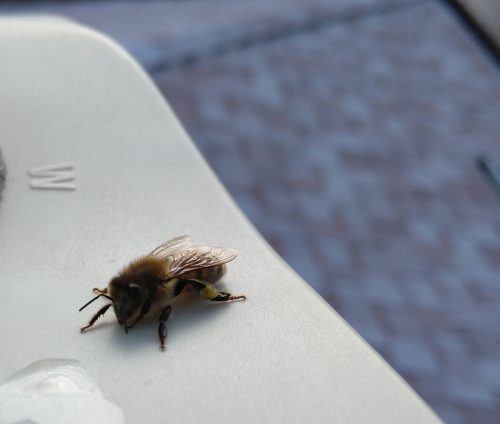
This guy hung out with me for a bit while I was replacing batteries and cleaning sensors:
However, next time it rained it stopped again. Then it dried up and started again. Then rained again, etc. So it was dying when wet. And the humidity reading was stuck at 99%. I tried all the troubleshooting procedures I could find but was unable to restore functionality.
So, I bought a new sensor array and installed it today. The new array is an upgraded design. It’s easier to take apart and clean. They reduced the power requirements so it runs on 2 AA batteries instead of 3. And they added a super capacitor to the solar array so it can run off sunlight without pushing any current through the batteries (the previous version pushed the solar current through the batteries to both stabilize the power and trickle-charge the batteries).
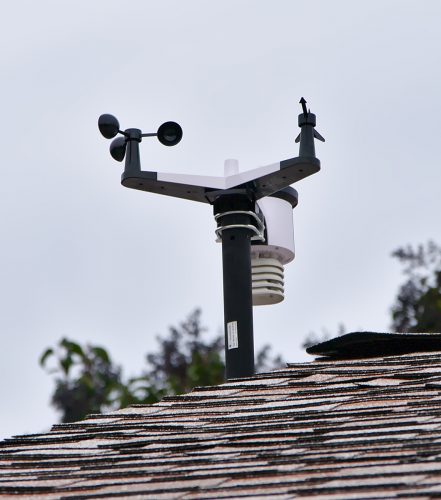
So the my weather station is up and running again!