Nissan Leaf 2015

March 21, 2026 8:51 am

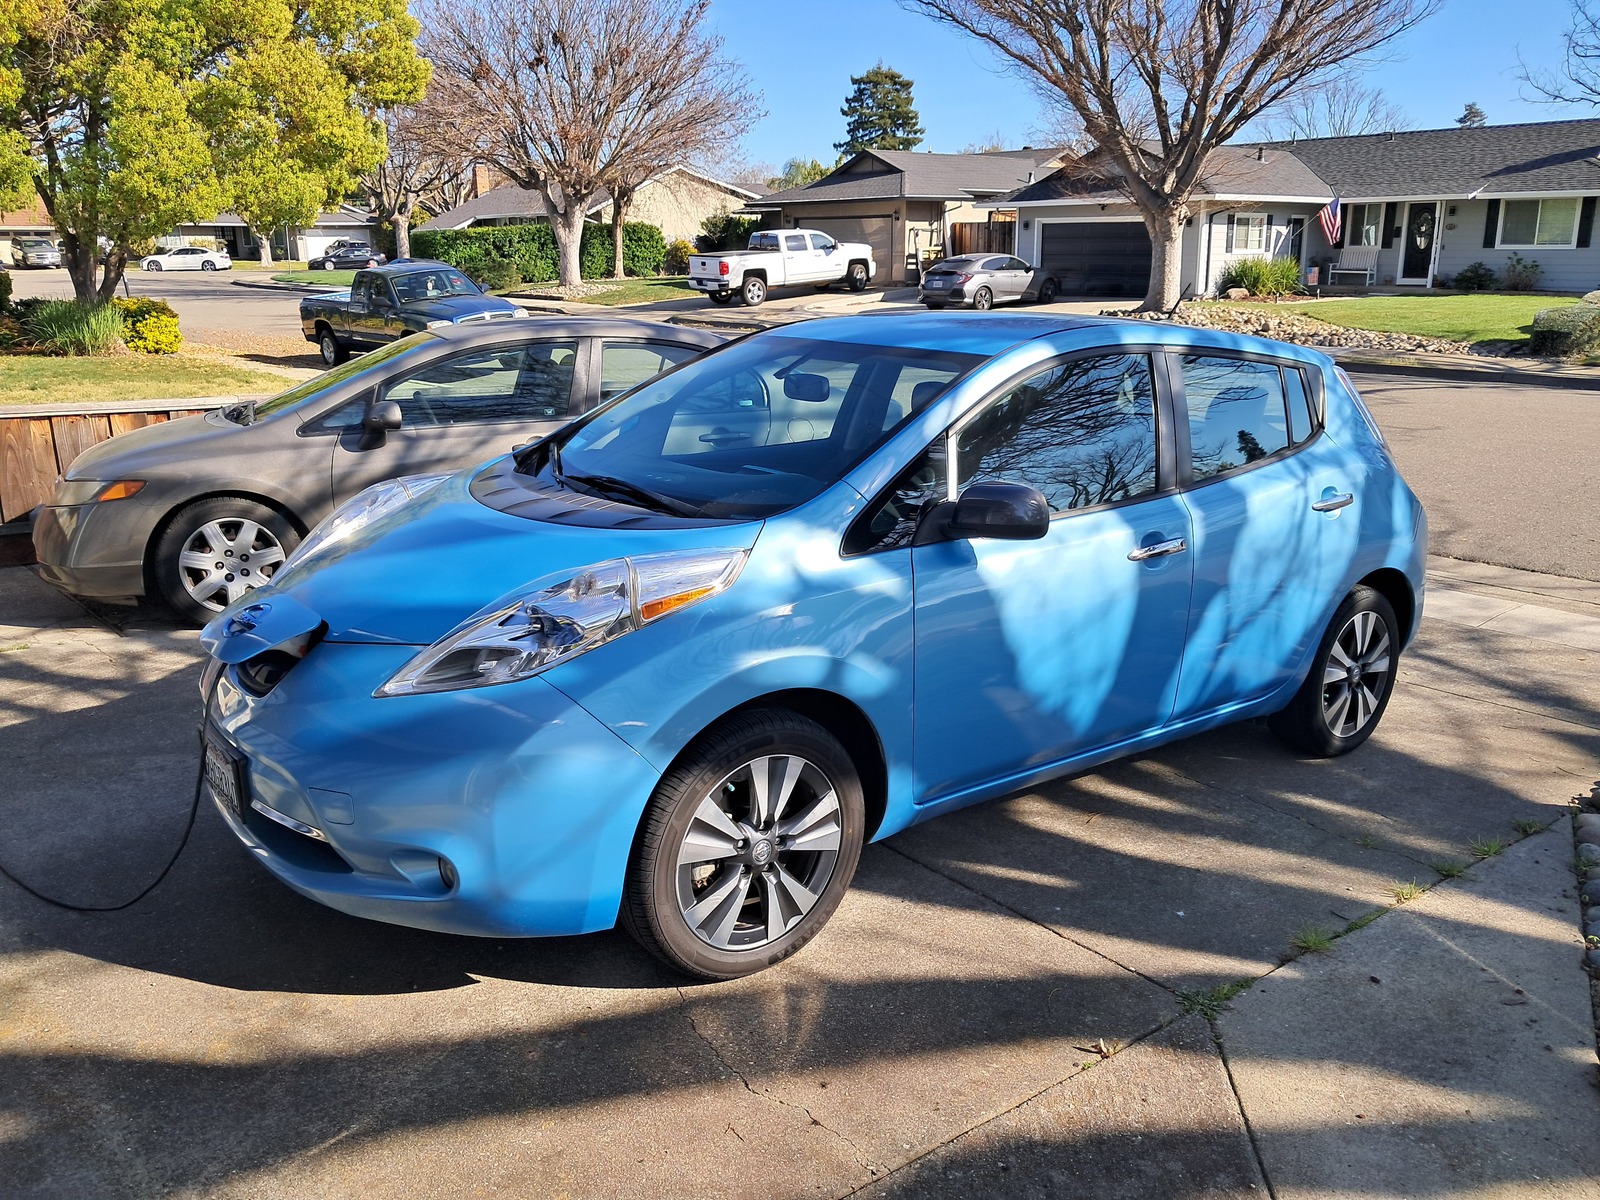
With the very real possibility of oil/gas prices climbing to catastrophic levels due to absolutely stupid military activity by the U.S. against Iran I decided to snap up an old Nissan Leaf while the getting was good.

There were quite a few options available when I started my search on the weekend of March 7/8. I made a short list, but didn’t see a way to fit anything into our schedule until the following weekend. On the morning of the 14th I called the broker in Walnut Creek with our top pick, but they said they already had someone scheduled to look at it and were going to hold it for them for a few hours. A couple hours later they called back to say the first person was unable to get the financing they needed so it was available to us.

We went up and drove it around a for a little bit and dropped it off at a shop for an inspection. While we waited we walked down to a 7-11 to buy some snacks and shortly after, it was ready for pickup. No major issues. Some age-appropriate wear and tear. So we bought it. $4500. Still has about 65 miles of range on a full charge–which is plenty for our around-town driving.

After we already said we would buy it the employee was telling us that they had 4 calls about it just that morning. It had been on their lot for 3 weeks and they even dropped the price once. I guess we weren’t the only ones thinking an electric vehicle sounded increasingly like a good idea.

Remediations

The car didn’t need anything to be drivable, but there were some easily remedied issues I took care of. Wiper blades and cabin air filter needed to be replaced. The location of the cabin air filter is super obnoxious. Of all the work I did it was easily the most annoying.

A strut on the hatchback was leaking, $20 for a pair of new struts and replacing them took less than a minute.

The driver’s door must have had some work done on it at some point, though no accident appears on the vehicle history. One of the brackets that holds the door on wasn’t paint-matched and the door didn’t hit the strike plate quite perfectly. It was only barely offset and my regular shop adjusted the strike plate so that it matches up just right.

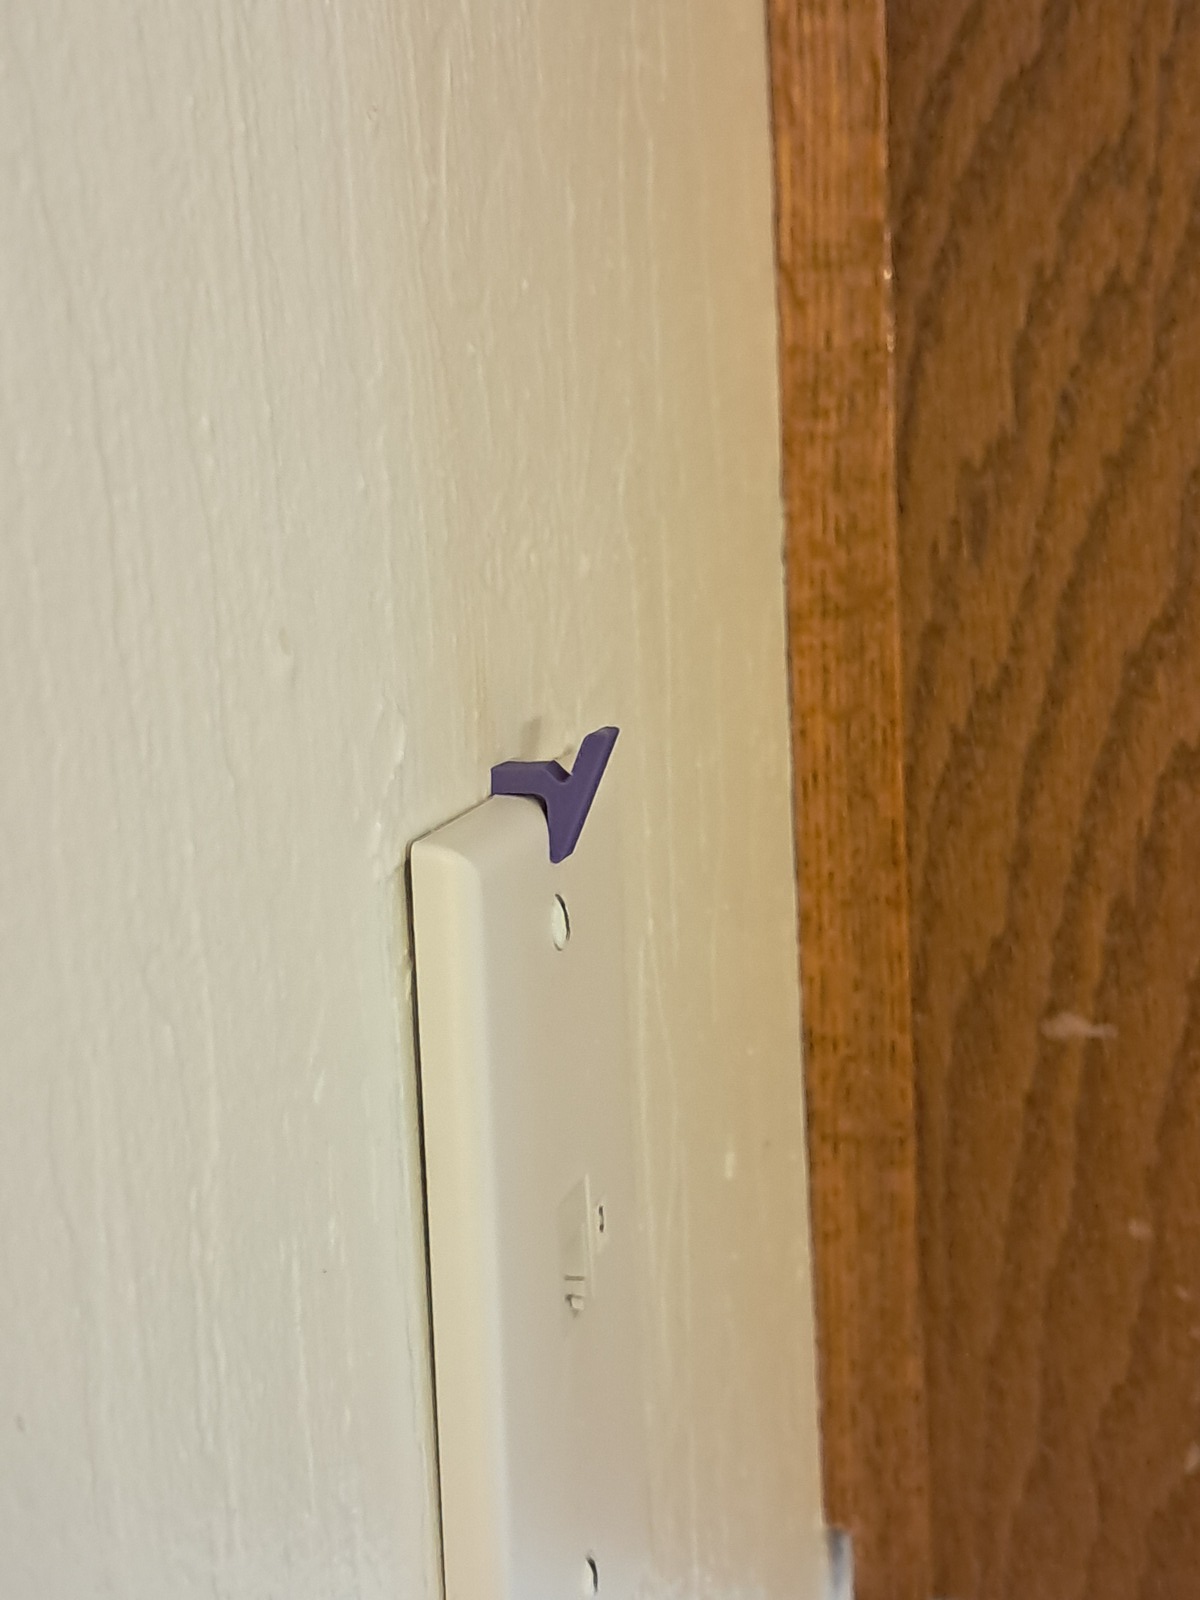
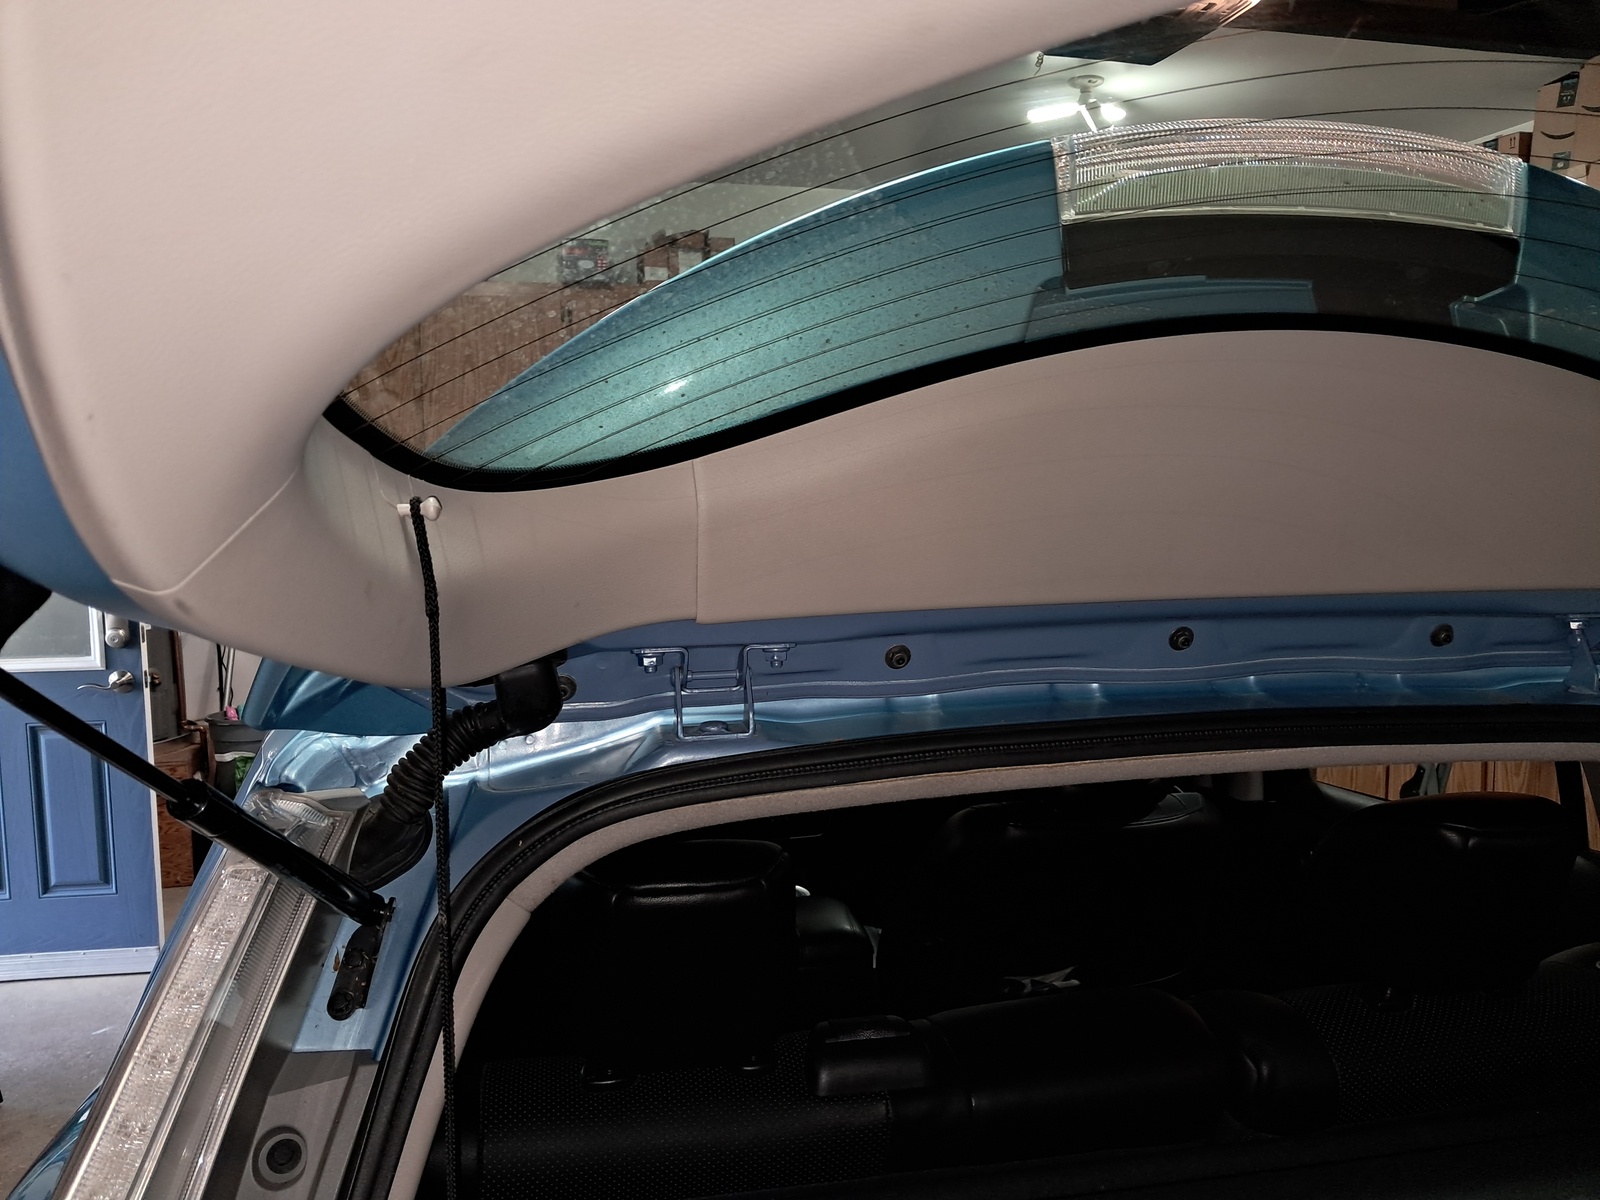
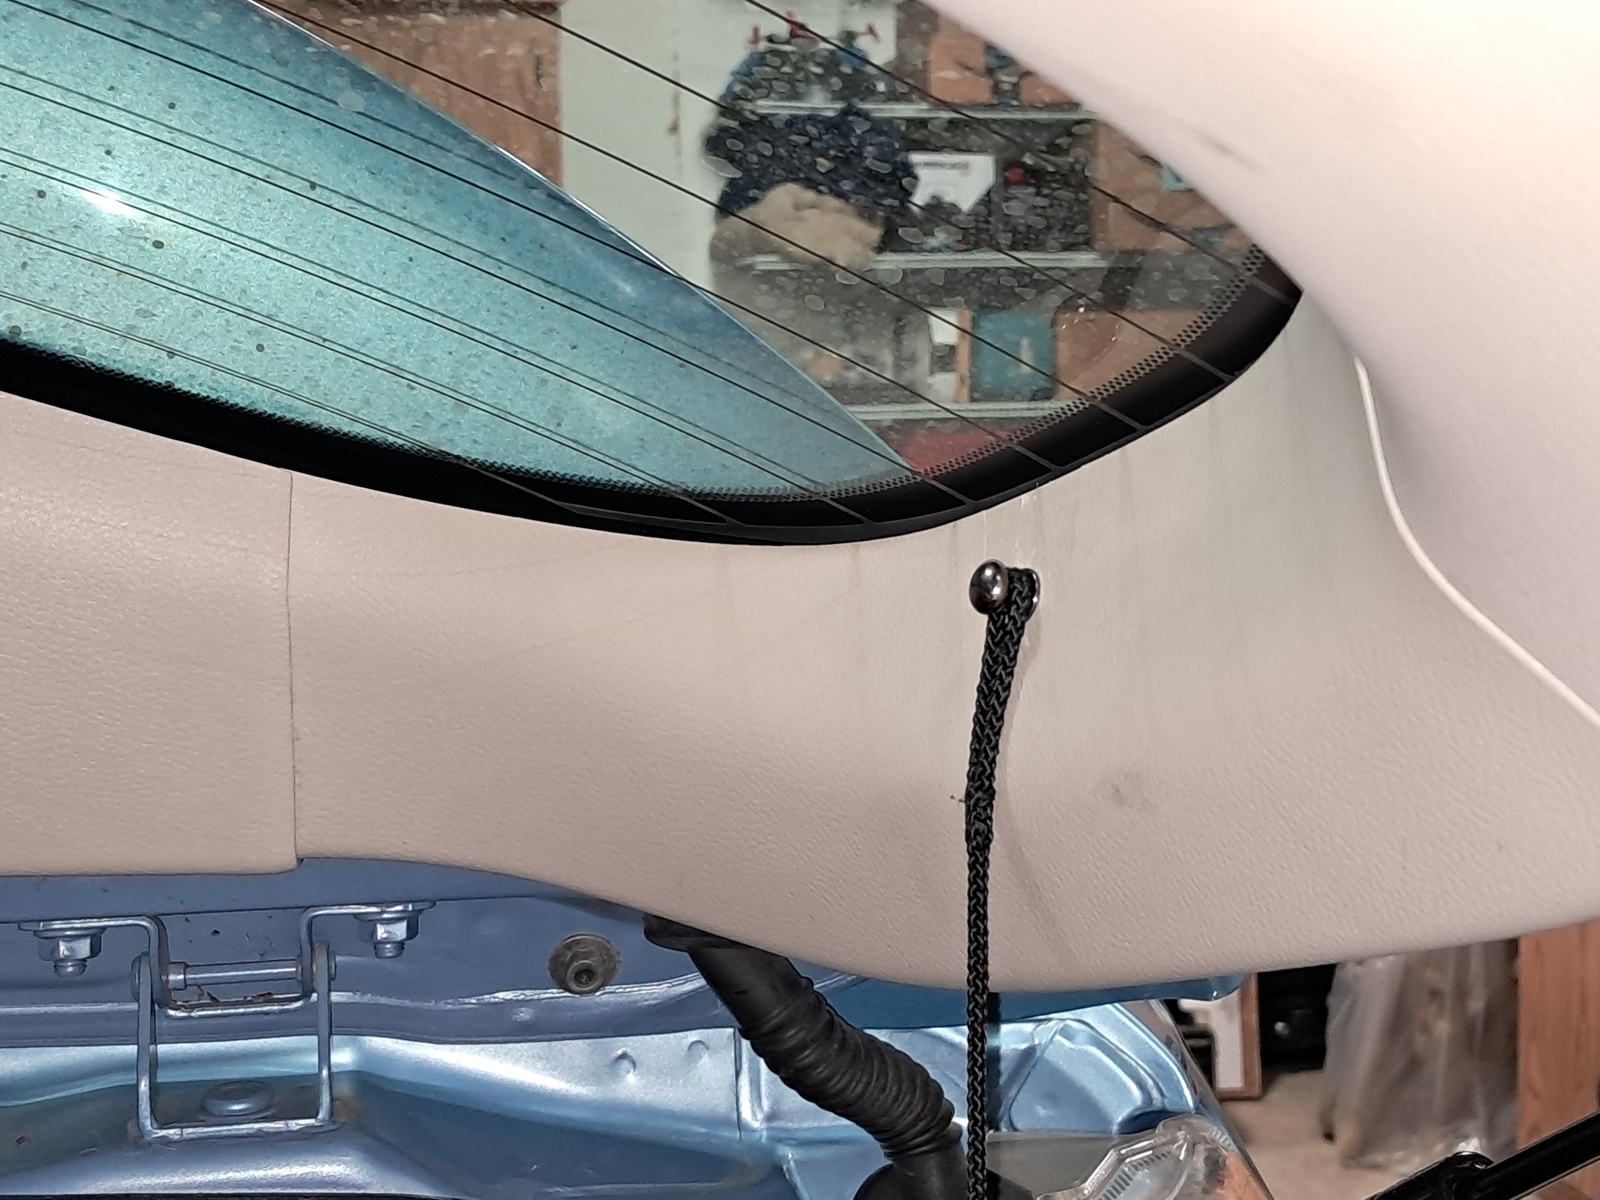
The cargo area has a cover which hooks onto the hatchback to lift it up when the hatch opens. One of the nubs which it connects to on the hatch trim had snapped off. You can’t buy the part anymore and rather than try to find one from a junkyard I made my own solution. I found something on Amazon described as a 10mm ball-head stud rivet with screw back. I pulled the trim off (very carefully) and filed down the broken nub. I drilled a hole just big enough for the screw on the back piece of the rivet. To fit a washer, in order to distribute the load across more of the plastic, I had to cut out a little rib of plastic, but it all went together beautifully.

The 2015 Leaf allows you to schedule when charging can happen, which is important for our electric metering which has peak and off-peak rates. When I went to set it up the computer was complaining something about the clocks being out of sync: “The clock used for the timers is different from the navigation system’s GPS clock. Please synchronize the timer’s clock with the GPS clock to use the timers.” Apparently, the car and the navigation system each have their own clock and if they’re out of sync it won’t allow you to set up schedules. Anyway, it then gives you a button to press to “resync the timers” and when I pressed it it threw an error and told me to try again or visit a service center.

After a few tries with the same result I turned to the internet to begin sleuthing out more information. I found a number of posts about the issue, with some guidance about using the secret, service menu to set the vehicle clock manually. The theory is that if the clocks are too far out of sync it will fail to automatically synchronize them when you push the button. Why that would be the case, who knows. It seems easier to say, “I got a reliable GPS signal, use that info to set all of the clocks!” but that’s not what it does.

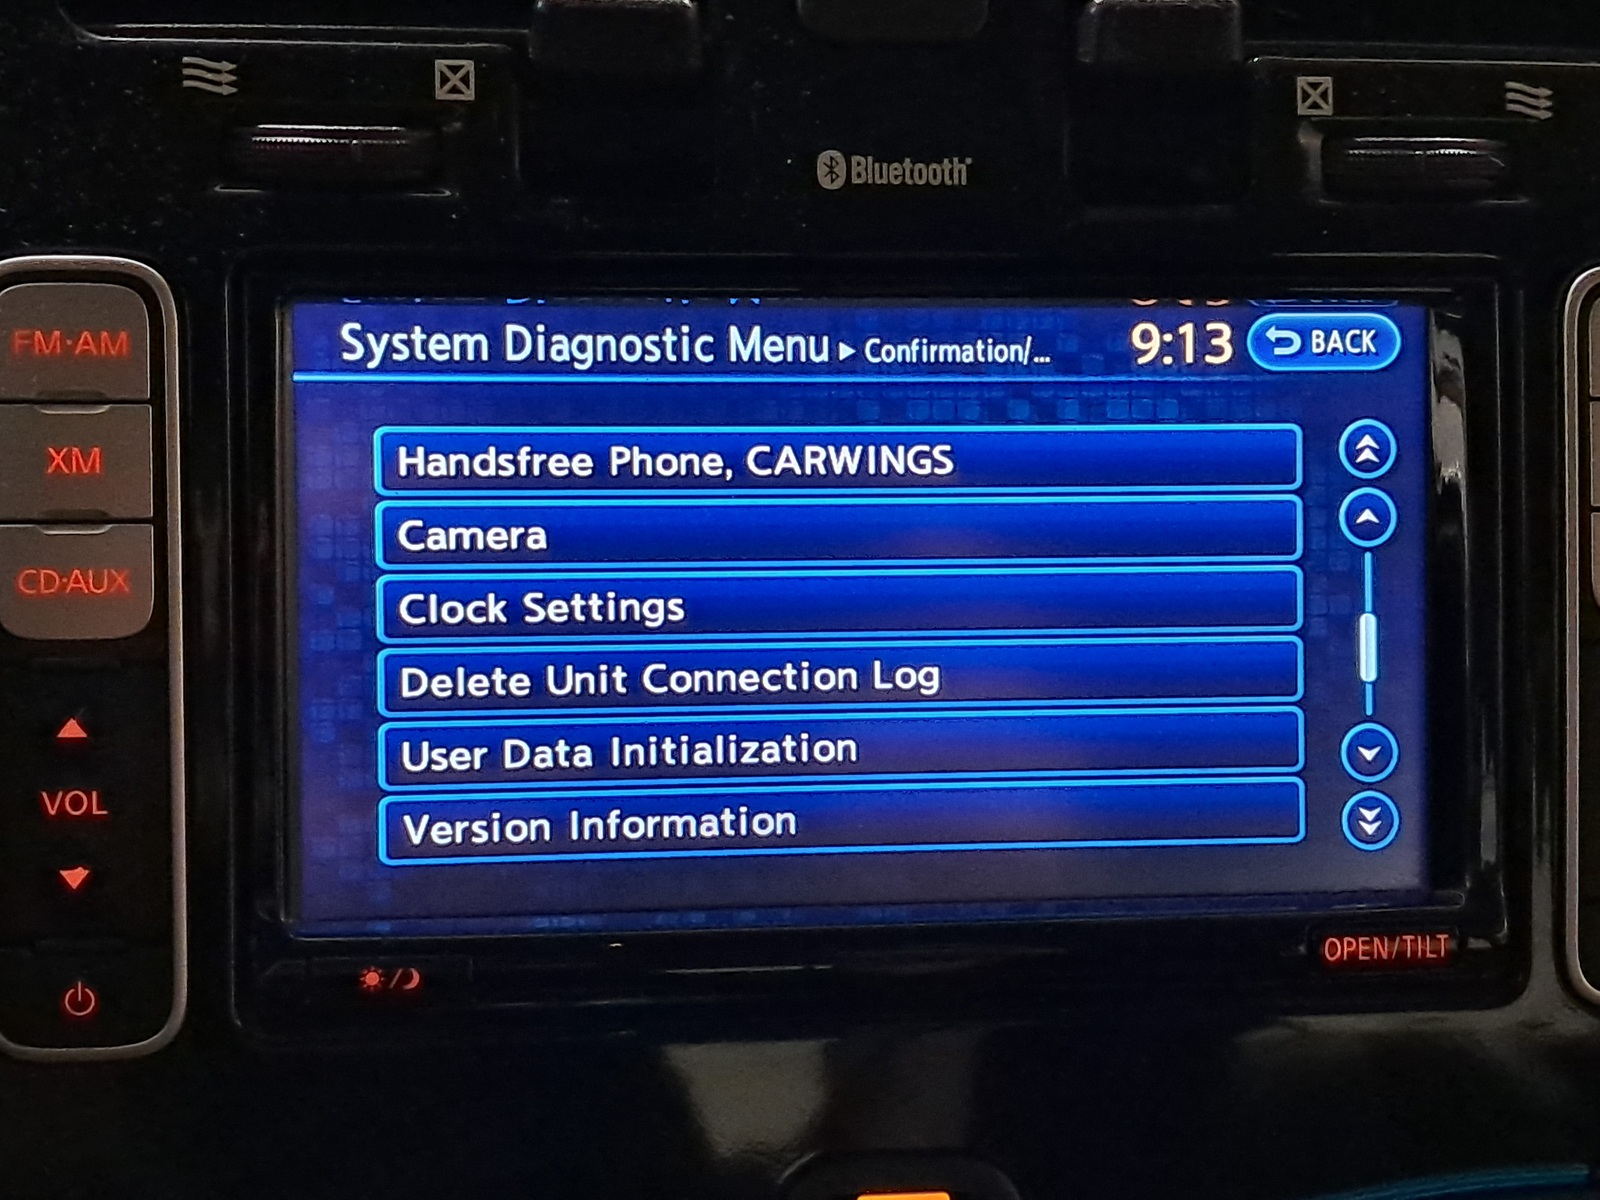
The big question is, “How close do they have to be for the sync to work?” But first, how to access the secret, service menu: With the Audio Power off, press “Map” 3 times (waiting for the double beep each time), press “Audio Power” 2 times, press “Map” once. That should take you to this menu:

Go to “Confirmation/Adjustment”:

Scroll down to “Clock Settings”:

The “Clock Settings” page looks like this:

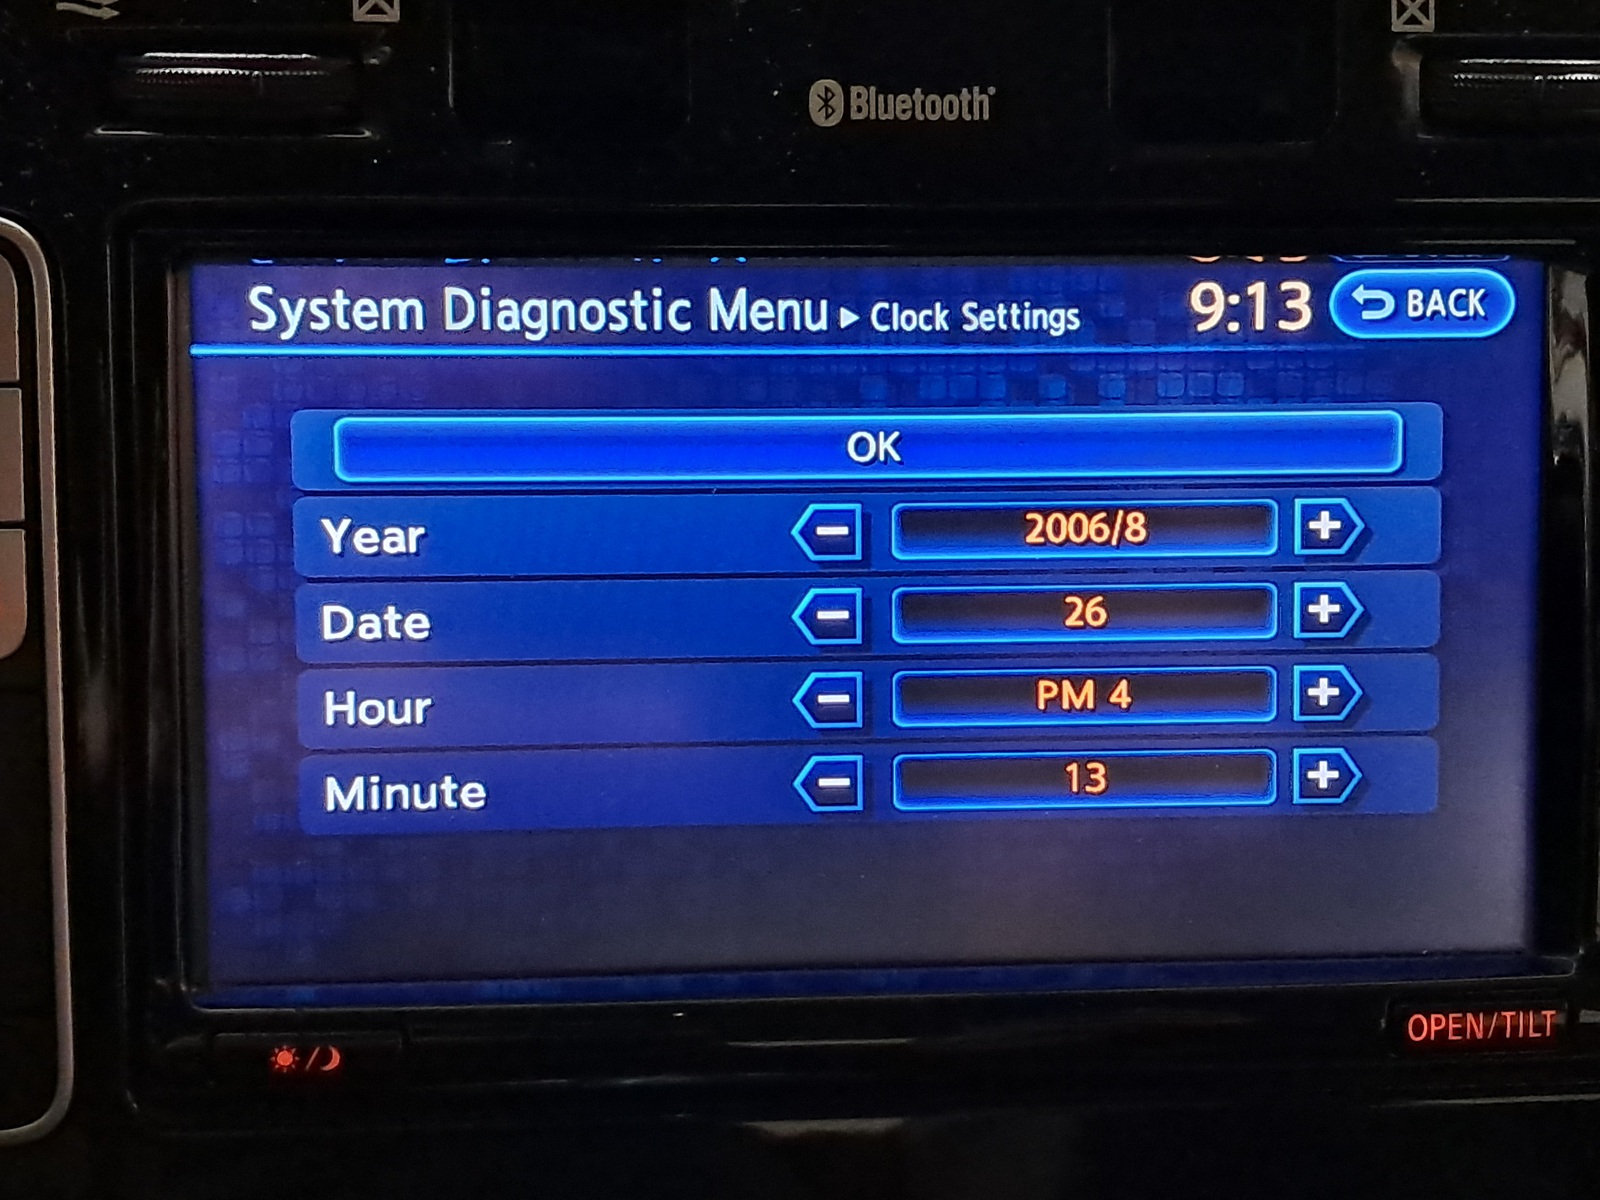
Based on my experience, this menu always shows Year 2006/8 and Date 26 when opened–regardless of what it’s actually set to. “Year” is “Year/Month” and “Date” is “Day of Month.”

So, we can use this menu to set the vehicle clock. But set it to what? When I set this information to the current date/time I saw the clock on the dashboard change…to something not what I set. There was something suspicious about the time it was showing, but after a couple of minutes it would update to the correct time (presumably after the GPS signal was processed). Regardless, I still couldn’t get it to “resync the timers.”

I then realized the key. One of the main forums on which I was reading about the issue is based in the UK and the time it was temporarily showing me was the correct offset from UTC (though in the wrong direction). The secret, service “Clock Settings” page must be set to the correct UTC time. It was working for the UK users to set their regular correct time because it just so happened to also be UTC. Once I set it to UTC, “resync the timers” worked and the charging scheduling is working beautifully.

I couldn’t find any documentation stating this anywhere on the Internet. So here’s my incremental contribution to the world’s knowledge.
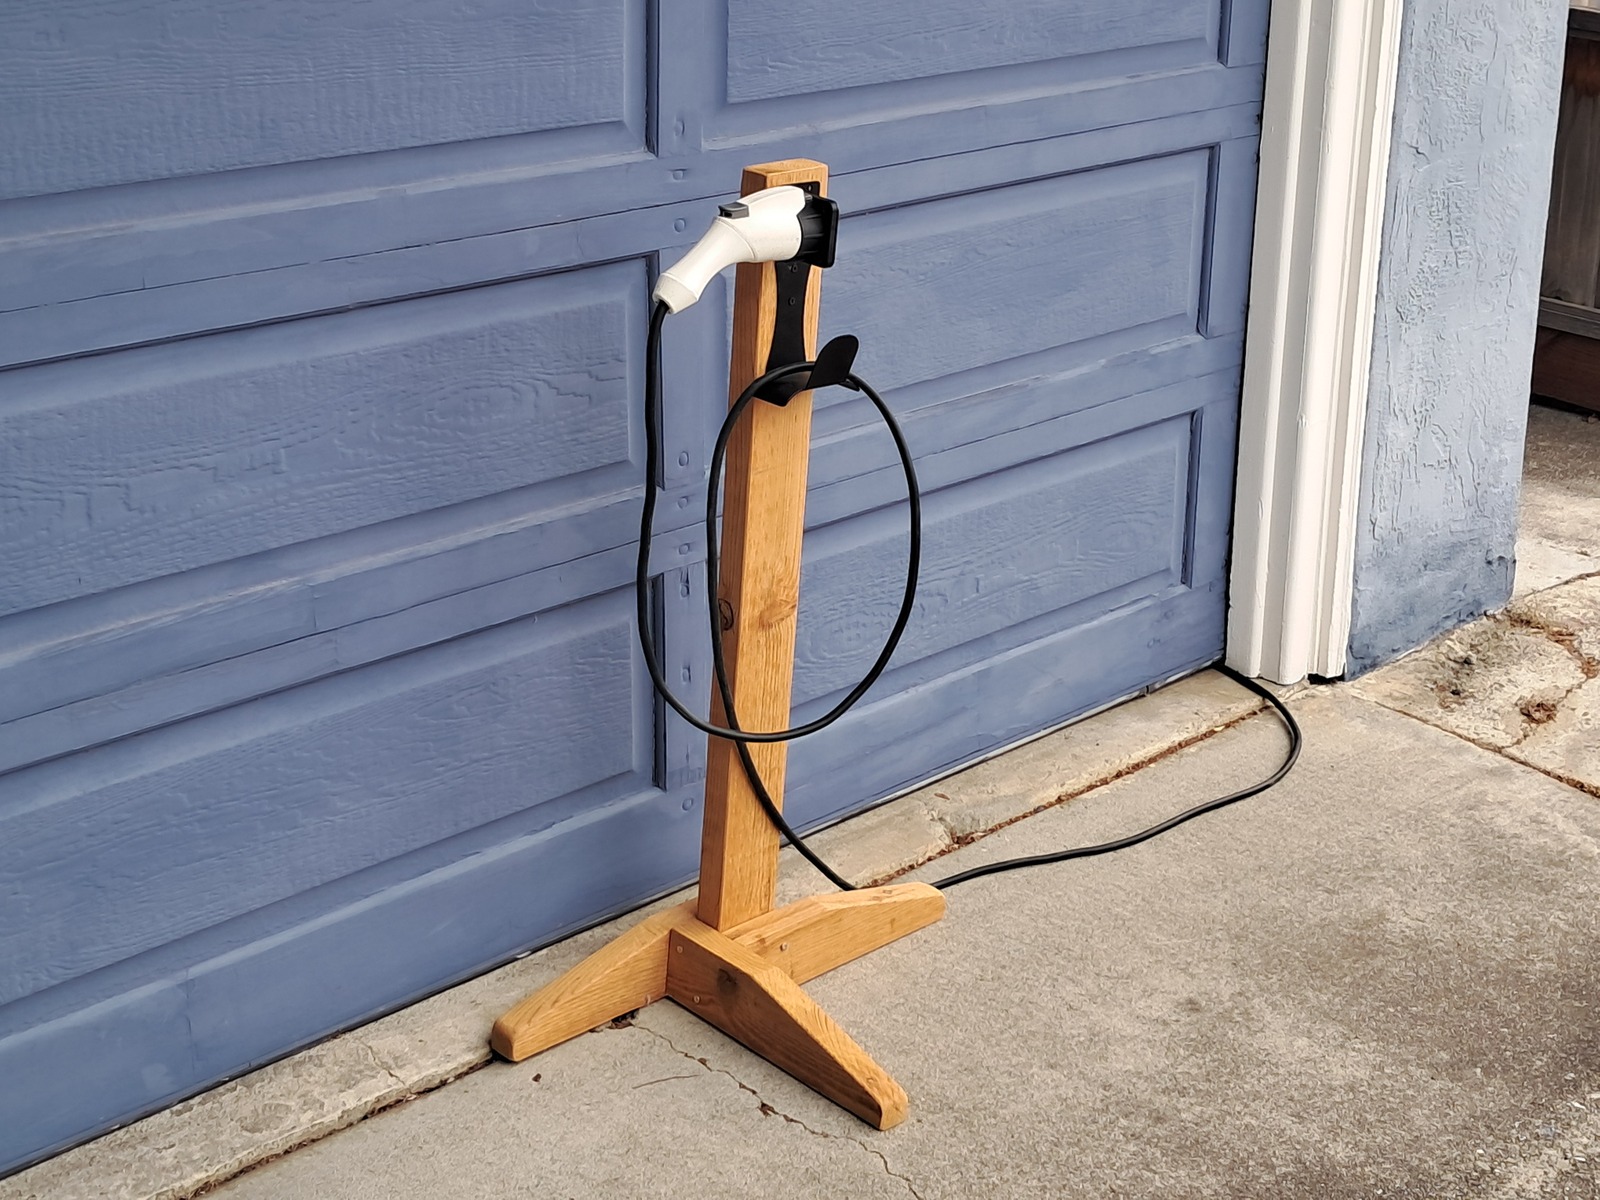
Charging Stand

Finally, to make life a little more convenient, I built a little stand for the charger. I was going to use pressure-treated wood and paint it, but it was all in terrible condition. Corinne convinced me to buy the redwood sitting next to it instead. I like the color, so I’ll keep it.

I’m very pleased with the purchase. I like how it drives. I like how quiet it is. I like that I have a small sliver of the “future we were promised” of electric vehicles powered by sunshine–directly from the solar panels on our house!

ePhotoFrame Project

January 19, 2026 8:31 pm

Curious about the current state of consumer-available, color-eInk screens I found that WaveShare is selling this device: RPi-Zero2W-PhotoPainter. It’s not quite a product by itself, but it’s a considerable step towards “product” from when I used a 3-color display to build my “Home Board” back in 2018. The “PhotoPainter” is a 7.3-inch, 6-color, 800×480 pixel, ePaper screen which can be ordered with a pre-installed RPi Zero2 W (with microSD card). It’s connected to a custom PCB with battery leads, power switch, and a UART serial lead. The screen is mounted in a wood frame with integrated table stand. I say “product” because it doesn’t _do_ anything out of the box. You need to bring some programming capability to the table and make it do something useful. But, unlike when I built the Home Board, I don’t have to do all the physical assembly and can focus on the software.

I wiped the provided SD card and loaded a fresh install of Raspbian which allowed me to pre-configure the device for my Wi-Fi network and enable SSH access.

From there I dissected the provided example code and wrote a custom script to drive the display. My code is available on GitHub: https://github.com/kdickerson/ePhotoFrame.

My set up uses nextcloudcmd to synchronize photos from the family NextCloud instance to the frame. Every 10 minutes the frame selects an image randomly and displays it. But, images need some processing before going to the display. When an image is prepared we save the prepared version and when selecting an image we check if we’ve prepared it previously and use that instead of duplicating the work.

The preparation resizes and crops the image to fill the display. To target where to crop it runs a face-detection neural network and targets the location of the weighted average of the detected, high-confidence faces. If no faces are detected, it instead calculates the location of highest “saliency” (a measure intended to identify “interesting” parts of an image based on information density).

Once the image is resized and cropped it needs to be dithered into the 6 colors displayable by the screen. This is the prepared version stored for future re-use. There’s still one more step of processing before sending the image to the screen, but I store this version because it’s still human viewable as a regular image file. The final step is to repack the bits. The display uses 4 bits per pixel to select which of the 6 colors to use and then packs each pair of pixels into one byte.

The final bit buffer is pushed to the display using WaveShare’s provided driver package.

The final effect of the dithering can vary quite a bit depending on the specific scene and colors involved, but generally it looks decent from >4 feet (closer than that and the dithering is incredibly obvious). The colors are fairly muted, which is common in ePaper displays currently. But the ePaper display is critical for my biggest criteria: no glowing screen.

I decided to hang it up in the kitchen to cover an old telephone jack. But I needed a hook somehow. So I quickly designed and printed a hook to slip behind the wall plate and held in place by the screw. 3D printers are super handy for those little things that otherwise don’t exist.

Migrating to Home Assistant Green with ZBT-2

December 30, 2025 3:12 pm

I have been running Home Assistant from a RPi 3B with a Conbee II stick for Zigbee (using ZHA) for years now. Finally decided to upgrade and directly support the Home Assistant project by migrating to a Home Assistant Green device with the Home Assistant Connect ZBT-2 Zigbee adapter.

I wasn’t sure how painful the process was going to be, so now that I’ve done it, I wanted to document it. It went quite smoothly with really only one tiny hiccup.

I made a backup of my existing system and shut it down. I moved the Conbee II stick to the HA Green, connected the network cable, and plugged it in. It showed up on the network without issue. When I connected to it, it said it was “starting up” or something similar. Expanding the details didn’t show anything happening. After a few minutes I started to get concerned that perhaps there was an issue, but shortly thereafter it finished and showed me the setup page. I restored from the backup and waited a bit for that to complete (it would be a nice improvement to have a progress bar for the restoration process).

When the restoration completed, I logged in as expected and saw that the Zigbee system (via ZHA) was grumpy about something and that HA detected updates to install. I installed the updates first before tackling the ZHA issue. It was complaining about the current configuration not matching the last backup. I had thought moving over the existing Conbee II dongle and doing the restore would go more smoothly than trying to jump directly to the ZBT-2 while doing the hardware upgrade, but that seems to have been a mistaken assumption. I clicked on the gear icon for ZHA and it asked if I wanted to reinitialize the existing adapter or migrate to a new one. At this point, I suspect I could have migrated to the ZBT-2, but I wanted to get things functioning with known-good hardware to minimize variables so I opted to reinitialize the existing adapter and that seemed to work fine. ZHA stopped complaining and my Zigbee devices started re-establishing communications with Home Assistant.

Next I plugged in the ZBT-2 and followed the instructions it came with to add the device. It performed the firmware update to configure the adapter for Zigbee, but then the onboarding flow stopped. But I simply clicked the “Add” button on the automatically-detected ZBT-2 device again and everything completed without issue. I unplugged the old Conbee II dongle after the migration completed (when HA says you can do that) and verified that my Zigbee devices were still functioning with the new adapter.

But some of my Zigbee devices fell off the network during the migration. All of which were battery-powered devices: two water-leak sensors (a third one stayed connected), a vibration sensor, and a button (a second one stayed connected). Not sure why some stayed of and some fell off. I believe the three water-leak sensors are the same make/model. Same for the two buttons.

Overall, pleasantly low friction in this migration.

Cider Making

September 14, 2025 2:54 pm

I like apple cider, but it’s hard to find good (or even real) cider around here without driving way out to the orchards in the foothills of the Sierra Nevadas.

So I bought a grinder and a press and built a cider station!

Building the bench took up a good chunk of Saturday–longer than I expected since it’s not exactly complicated, but I plugged along until it was done.

That made Sunday, Cider Sunday!

I bought 9.5 pounds of apples from Safeway: 50% Granny Smith, 25% Fuji, 25% Envy. I sliced them up, Corinne put them in the grinder, Heather ran the grinder. Then we loaded them into the press and out came beautiful, rich cider.

The 9.5 pounds of apples turned into 4.5 cups of cider. Less than I was expecting, but it tastes really good.

Also….not cost effective. I’ll have to pay attention to sale prices on apples. My delicious cider, ignoring equipment costs and labor, came at a cost of $6 a cup, yikes.

Mint 22.1 + Kodi 21.2 + Beelink Mini S12

March 8, 2025 6:46 pm

The latest in my series on the subject, this follows the last upgrade in 2023: Mint 21 + Kodi 19 + Intel NUC i3.

I’ve replaced my aging Intel NUC with a Beelink Mini S12. The fan seemed to have a bearing beginning to fail. I figured I better get on replacing it while it was giving me forewarning rather than waiting for it to catastrophically fail (and before more tariffs increased prices further). I had looked into just replacing the fan, but couldn’t find a part I could guarantee would work. And it was 11 years old. And the Beelink Mini S12 was only $160 and offered a significant leap in processing power, storage, and RAM while lowering electrical usage.

I bought this one. The Beelink Mini S12 with Intel N100 processor, 16 GB RAM, and 500 GB SSD.

My first challenge was getting the Beelink to boot off a USB drive. For whatever reason it didn’t like the drive I was using and after futzing around for a while I tried another one, it booted fine, and I got Mint 22.1 installed without issue.

Install Kodi

The Kodi PPA is no longer maintained and the recommended solution is the Flatpak.

$ flatpak install flathub tv.kodi.Kodi
# To fix pipewire access (maybe not necessary?):
$ sudo flatpak override tv.kodi.Kodi --filesystem=xdg-run/pipewire-0

How to get audio passthrough working correctly changed again in this release. Theoretically the most recent versions of Pipewire handle it correctly with Kodi “out of the box,” but the version of Pipewire installed in Mint 22.1 was not doing it.

This goes hand in hand with configuring the machine to auto-boot into Kodi directly and skip loading a Cinnamon user session.

Create a script to launch Kodi with ALSA:

$ mkdir ~/Scripts
$ touch ~/Scripts/kodi_custom_session_launcher
$ chmod +x ~/Scripts/kodi_custom_session_launcher
$ nano ~/Scripts/kodi_custom_session_launcher

File Contents:

#!/bin/bash
flatpak run tv.kodi.Kodi --audio-backend=alsa

Create a custom XSession entry which we can select from the login screen:

$ sudo nano /usr/share/xsessions/Kodi_ALSA.desktop

And the file contents:

[Desktop Entry]
Name=Kodi with ALSA
Comment=This session will start KODI Media Center
Exec=/home/kyle/Scripts/kodi_custom_session_launcher
TryExec=/home/kyle/Scripts/kodi_custom_session_launcher
Type=Application

Now if you log out you should be able to select “Kodi with ALSA” as a session option from your login manager.  In Mint, this is accomplished by clicking the circle to the right of the user name.

As in the past, after a little fussing and some restarts I eventually saw the correct audio targets in the Kodi settings and everything seems to be happy with the audio passthrough support.

When running as a flatpak, the Kodi configuration is in a new location:
/home/kyle/.var/app/tv.kodi.Kodi/data

I set up some stuff in Kodi’s advanced settings file to disable the splash screen and hide the ext4 file system’s “lost+found” directories.

$ nano ~/.var/app/tv.kodi.Kodi/data/userdata/advancedsettings.xml

File contents:

<?xml version="1.0" encoding="UTF-8"?>
<advancedsettings>
  <splash>false</splash>
  <video>
    <excludefromlisting>
      <regexp>lost\+found</regexp>
    </excludefromlisting>
    <excludefromscan>
      <regexp>lost\+found</regexp>
    </excludefromscan>
    <excludetvshowsfromscan>
      <regexp>lost\+found</regexp>
    </excludetvshowsfromscan>
  </video>
</advancedsettings>

IR Remote Control

The Beelink Mini S12 doesn’t have a built-in IR receiver like the NUC did. So I bought a FLIRC USB IR Receiver. The system sees it as a keyboard, so you don’t do any configuration with Linux’s built-in IR receiver support. Instead run the FLIRC configuration tool. It helpfully has a Kodi configuration mode which shows you all the keyboard commands that Kodi understands and trivially lets you map buttons on your remote to those commands.

Here’s my configuration which maps the buttons to the same ones I’ve been using on my Onkyo RC-764m remote using remote code 33003:

Lyrion Music Server

Logitech Media Server is dead, but Logitech rather graciously handed the project over to the community (presumably with the requirement that they not use Logitech’s name). The community rebranded it the Lyrion Music Server.

I downloaded the package for version 9.0.1 from
https://downloads.lms-community.org/LyrionMusicServer_v9.0.1/lyrionmusicserver_9.0.1_amd64.deb

And to install:

$ sudo apt install ./lyrionmusicserver_9.0.1_amd64.deb

Preferences are stored at /var/lib/squeezeboxserver/prefs

External Hard Drives

I’m still having issues with the external hard drives disappearing and needing to be remounted. I’ve slightly updated my script from the last post as I discovered there were 2 possible failure modes to check when deciding if a disk needed to be remounted:

#!/usr/bin/bash
needed_to_remount=false
if ! mountpoint -q /mnt/TV || ! ls /mnt/TV > /dev/null; then
  needed_to_remount=true
  mount /mnt/TV
fi

if ! mountpoint -q /mnt/General || ! ls /mnt/General > /dev/null; then
  needed_to_remount=true
  mount /mnt/General
fi

if ! mountpoint -q /mnt/Movies || ! ls /mnt/Movies > /dev/null; then
  needed_to_remount=true
  mount /mnt/Movies
fi

if ! mountpoint -q /mnt/4TB_Storage || ! ls /mnt/4TB_Storage > /dev/null; then
  needed_to_remount=true
  mount /mnt/4TB_Storage
fi

if [ "$needed_to_remount" == "true" ]; then
  echo "$(date) Needed to remount disks"
fi

And the cronjob in /etc/crontab that runs this scripts every minute:

# Work around external drives being unmounted randomly
* * * * * root /home/kyle/Scripts/remount_disks.sh >> /var/log/remount_disks.log