Did you know that some numbers are illegal? It’s true.
No, there isn’t a law somewhere that says the numbers 745, 1,889, and 131,101 are illegal. In fact which numbers are illegal isn’t even known a priori. And there’s an unbounded (and possibly infinite) number of illegal numbers! It’s crazy!
So how are some numbers illegal?
It all started with the invention of digital storage mediums (i.e., the computer). You may have some notion about computers operating entirely on 0s and 1s. That is, they use a binary number system. Physically, these values are usually stored as a high or low voltage (electrical storage, like a USB thumb drive), the direction of magnetization (magnetic storage, like a hard drive or floppy disk), or as actual pieces of material (physical and optical storage, like a punch-card/CD/DVD/Blu-Ray). These physical representations are interpreted as either a zero or a one.
Since every piece of data on your computer is stored in some fashion and then interpreted, every piece of data on your computer is represented by a series of zeros and ones. Any series of zeros and ones in a binary system represents a specific number. In binary, 01101 is the decimal value 13. Therefore, every piece of data on your computer has a corresponding number that exactly represents that data.
Take this image for example:
It’s just a 64×64-pixel square with bands of red, green and blue. The number that is stored on the computer to represent this image is:
1238301683640466317815934360806135690116434697154877923
4494792367923755906673163981641861895458337604702343466
2810700348261887772411034091469320270991594673908631991
5844885402876248165441943076299189588485408932698051652
9274954637784672242688658729288559072939506175348618889
6499525714591179951958772678400887694932269665261700174
3252008568133749407688395385589539990171146138088533455
4251168727225022618657147246713345507166265266049883607
2457758487000098535759665677768294453081438629169206933
668292205864758173826
In any sense that matters, this number and that picture are equal—with the important understanding that I told the computer to treat that number as if it were a picture (specifically a png file). I could just as easily tell the computer to interpret that number as audio, or video, or text (but it would appear to be garbage if interpreted in any of those ways).
That picture is this number and this number is that picture. It has to be so in order for computers to work.
Now here’s where this gets interesting and a little bizarre.
There are many laws that make certain physical objects illegal to possess under many circumstances (drugs, explosives, etc.). But our legal system has also made certain types of information illegal to possess. One such category is child pornography. To my understanding it is illegal to possess any instance of child pornography, regardless of intent. If such an instance exists on a computer then the number that represents that illegal information is itself illegal, for the number and the image are one and the same.
Other types of information are legal to possess, but illegal to share with others. The DMCA makes it illegal to provide to others any tool which is capable of circumventing any measure designed to prevent access to a copyrighted work. Meaning I could write a piece of software to copy DVDs, but it’s illegal for me to use it or give it to anyone else.
This seems like it creates some real legal challenges.
I don’t think anyone would disagree that a website dedicated to posting and sharing child pornography would be illegal. But suppose that instead of pictures a website is set up dedicated to posting numbers. The only things posted are numbers and discussion of those numbers. Surely there’s no harm in a website dedicated to numbers.
Now suppose during the discussion of some number, someone suggests that people tell their computers to interpret that number as an image (create a file, load in the binary form of the number, set the file extension to .jpg or .png, or .gif). And suppose that the resultant image is illegal as described in the previous section. Who, if anyone, is legally liable for possessing or sharing this illegal number?
This is a theoretical practice as far as I’m aware, but let’s take another step anyway. MIT hosts a site with the first 1 billion digits of Pi. The current record for calculating Pi is just over 10 trillion digits (though not posted for viewing). Surely if pi continues on forever and never repeats it would have to eventually include all illegal numbers.
Suppose someone sets up a website that says start at the 19,995th digit of Pi, take the next 3,021 digits and interpret it as an image or run it as a program. And again, suppose that interpretation is illegal. Is anyone at fault? Should they be?
This is the trouble that occurs when information itself is made illegal.
This referencing is how your computer works though. You can consider your hard-drive as an incredibly long list of zeros and ones and through some conventions your computer looks at one set of numbers which tells it how to interpret the other numbers (go to the 1,313,163rd bit, take 766,122 bits and treat them as a picture).
So, given an illegal number sitting on your hard-drive, is the number itself illegal, or is it the other numbers elsewhere on the hard-drive that tell the computer how to treat the first number? Or is it only the pair together that’s illegal?
How many steps out do we go before illegal numbers are no longer illegal? Can I break up the numbers into parts and have people add them back together? Can I tell you to get X numbers from pi and then use those numbers to look up in pi the illegal number?
We can sort of borrow a concept from quantum mechanics to describe the situation: A number is a superposition of information. It only takes on definite meaning once a specific interpretation is applied. So is it the person applying or sharing the specific interpretation that is at fault?
Kyle’s Hypothesis
Using this superposition idea, I propose the following hypothesis:
A number exists which represents a perfectly innocuous piece of data but when interpreted in another format (e.g., image) is illegal.
What happens if some particularly popular number (e.g., a song in mp3 format) turns out to be the same number that represents something illegal?
In this case, it’s only the other numbers on the hard-drive that specify how to interpret the mp3 as either a song or something illegal. Is it then illegal to suggest to other people to interpret the same number they already have in a different way?
Once you start making information itself illegal to possess or distribute, you start creating some really bizarre corner-cases for the legal system.
(For the technically minded: For simplicity I’m ignoring the scenario where magic-number headers may be used to suggest file format within the file itself.)
Update to answer Megan’s question:
Megan asked what
846513265498765646454545431313
15464875465134876532165400014654684
would look like as a picture. As my parenthetical at the end the post alluded to, it’s not quite as simple as I made it sound.
There is this notion of “magic-number” headers. Which is really just a convention that computer scientists use that says when I want this data to be treated as a BMP file, the very first thing in the file will be the number “16973” which stands for the letters BM. There are similar magic numbers (or “fingerprints”) for many different file formats. Many programs that know how to open a BMP file, won’t even try if the magic number doesn’t match.
So by directly dumping Megan’s number into a file and trying to open it as various image formats I only got error messages. So I used the simplest file format with which I’m familiar (
pbm) and added the proper magic number (P3) and header (which describes the width and height of the image; I chose both to be 5 arbitrarily).
The resultant number is now
6086291824888092467866770275946841
3783905258129499855885219551478363
6286731887369226
And the image itself is just a smudge. The pbm format is black and white only, no grey. And I’ve blown the image up to 65×65 pixels so you could actually see something (remember it was only 5×5 to start with):
I did not change anything about the number Megan provided, I simply added the necessary information that tells the computer how to interpret that number into an image.
If I change that interpretation to expect a very simple color image (a PPM file with magic number P6, 4×4 pixels with only 8 possible colors) then the image looks like this (blown up to 64×64 pixels):
Most of the image is white, so you can’t really see it against the white background.

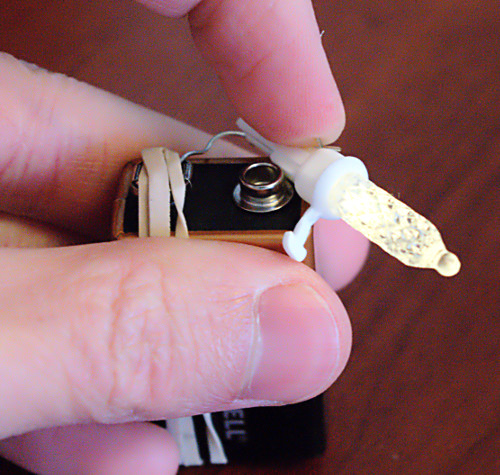
 If you touch the LED leads backwards nothing will happen (LEDs are one way only). It won’t damage the LED, but it won’t light up either. Because of this your bulb should be keyed to only fit in its socket one way. Pay attention to that keying so that you can reliably test the correct orientation and save some time.
 So with my makeshift tester I started popping out bulbs and testing them (the edge of a dinner knife worked great for popping the bulbs out of their base). I was actually getting pretty quick at it and it was the 21st bulb I pulled that was bad. Popped in a replacement and everything was working.


